May
24
Formatting Images
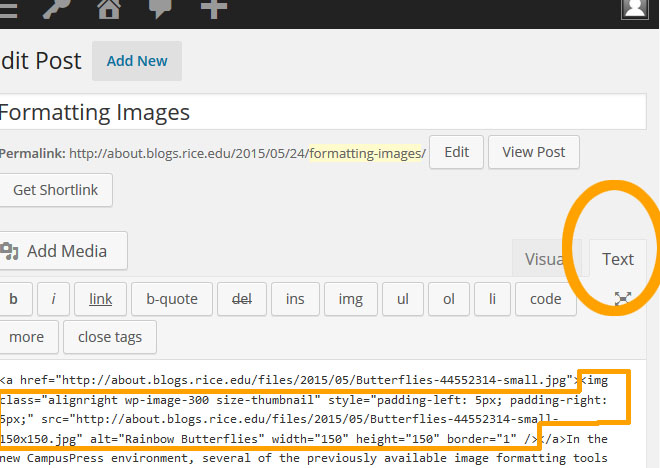
 In the new CampusPress environment, several of the previously available image formatting tools –like border and padding– are now part of a plug-in. If you don’t have time to become familiar with a new plugin for your first post in the new CampusPress environment, here is how to add border and padding the manual way.
- Add Media and select your image
- Select the aligment (left, right, center, etc.)
- Insert the image into the post.
- Go to the Text* version of your content and look for the img class code for that image. img class code is found between greater than/less than symbols (<>) and looks something like this: img class=”alignleft wp-image-300 size-medium” style=”padding: 15px;” src=”https://about.blogs.rice.edu/files/2015/05/Butterflies-44552314-small-200×300.jpg” alt=”Rainbow Butterflies” width=”200″ height=”300″ border=”1″ /
- If your image does not have the phrase about padding or the border, just copy it from the code below and paste into your img class code.
- border =”1″ (bigger numbers mean thicker borders)
- style=”padding: 15px;” OR you can specify more padding than one side or the other
- style=”padding-left: 15px; padding-right: 5px;” (bigger numbers mean more white space around your image)
*Text: If you usually compose your content in the Visual mode, look for the tab labeled “Text” to see the HTML code.